How To Fingerpick Solos on Guitar (Not Just Chords)
by Simon Candy
 Imagine being able to play solos with your fingers instead of a pick—smooth, fluid, and melodic.
That’s what this lesson is all about. You are going to learn exactly how to fingerpick solos on guitar—something almost no one teaches.
Here’s the thing: there are thousands of lessons on fingerpicking patterns for chords, but when it comes to playing fingerstyle solos, melodic fingerpicking lines, or even lead guitar techniques with your fingers, there’s very little out there.
So today I’m going to break it down for you.
You’ll learn 3 powerful fingerpicking patterns designed specifically for soloing.
I’ll first show you each pattern and how to train it, then I’ll demonstrate them in real fingerstyle solo examples—so you can hear exactly how they sound and how to apply them in your own playing.
Make sure you stick around until the end, because once you have these 3 patterns under your fingers, you’ll be able to handle almost any situation when it comes to fingerpicking solos.
Watch the video below to learn more:
Fingerpicking Patterns For Soloing On Guitar
Be sure to watch the video above for a detailed explanation, breakdown, and demonstration of each example presented below.
Pattern 1: Alternating Fingers
The first step to fingerpicking solos is alternating your fingers
Instead of using just one finger for every note, you alternate between your index (i) and middle (m) fingers.
This creates speed, efficiency, and flow.
If you only use one finger, you’ll hit a wall with speed and fluency.
Here is this pattern applied to an Am pentatonic scale, first ascending and then descending:
(i)

(ii)

• Riffs
Here is this pattern applied to some riffs extending from the pattern:
(i)

(ii)

Pattern 2: Alternating Thumb & Finger
With this pattern, we bring in the thumb, and alternate it with the index (i) finger
So the pattern is p/i — thumb down, index up
This creates a natural picking-hand groove and opens up a whole new sound.
Here is this pattern applied to an Am pentatonic scale, first ascending and then descending:
(i)

(ii)

• Riffs
Here is this pattern applied to some riffs extending from the pattern:
(i)
(ii)
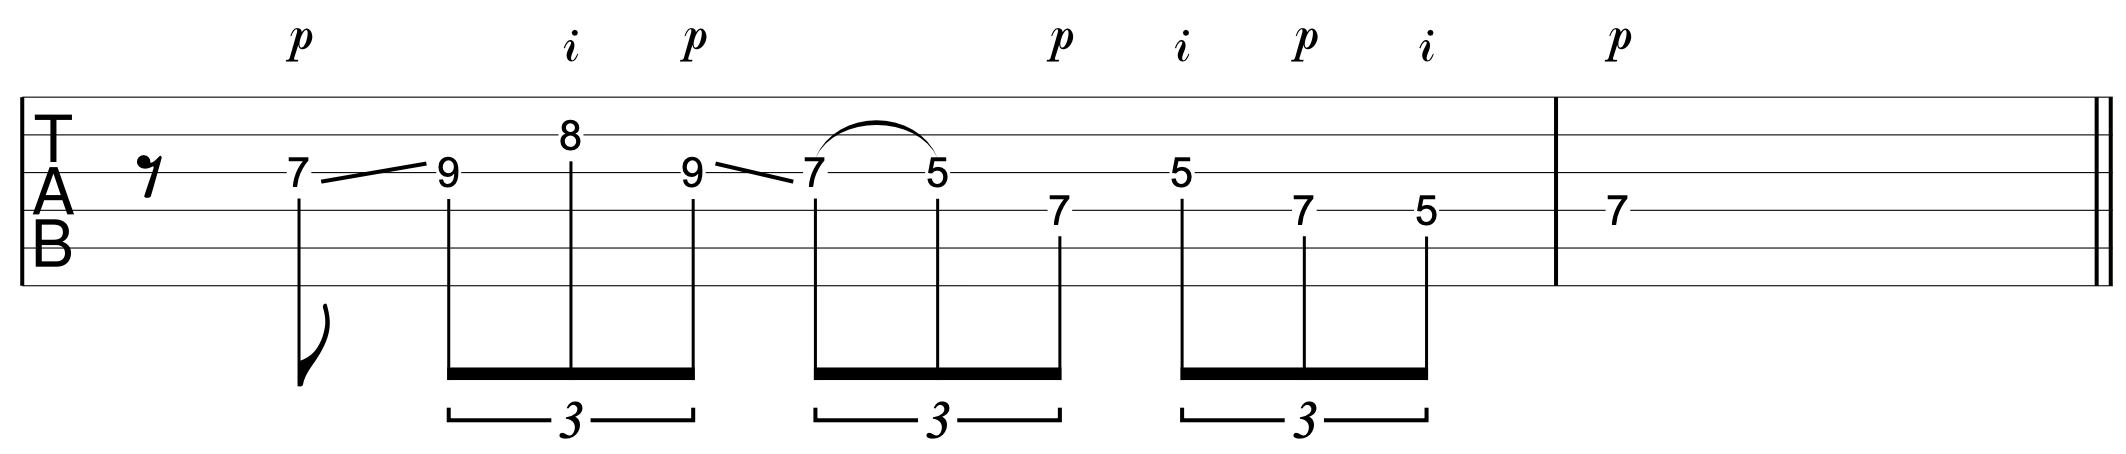
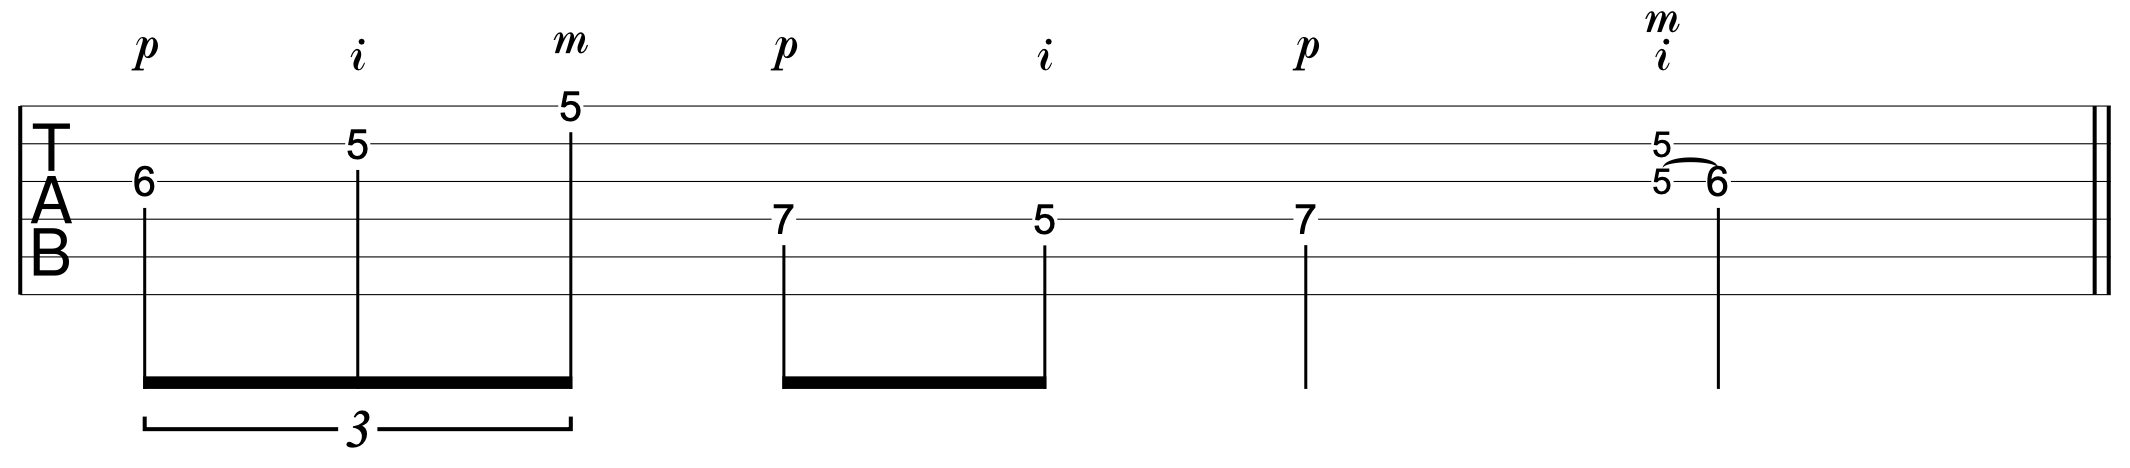
Pattern 3: Finger/Banjo Roll
A banjo roll pattern is simply a sequence of your thumb (p), index (i), middle (m) — either p/i/m going up, or p/m/i going down
It’s a rolling motion that makes your lines smooth and flowing, and is very useful to use in conjunction with the previous two patterns for playing solos with your fingers on guitar.
Here is this pattern applied to an Am pentatonic scale, first ascending and then descending:
(i)

(ii)

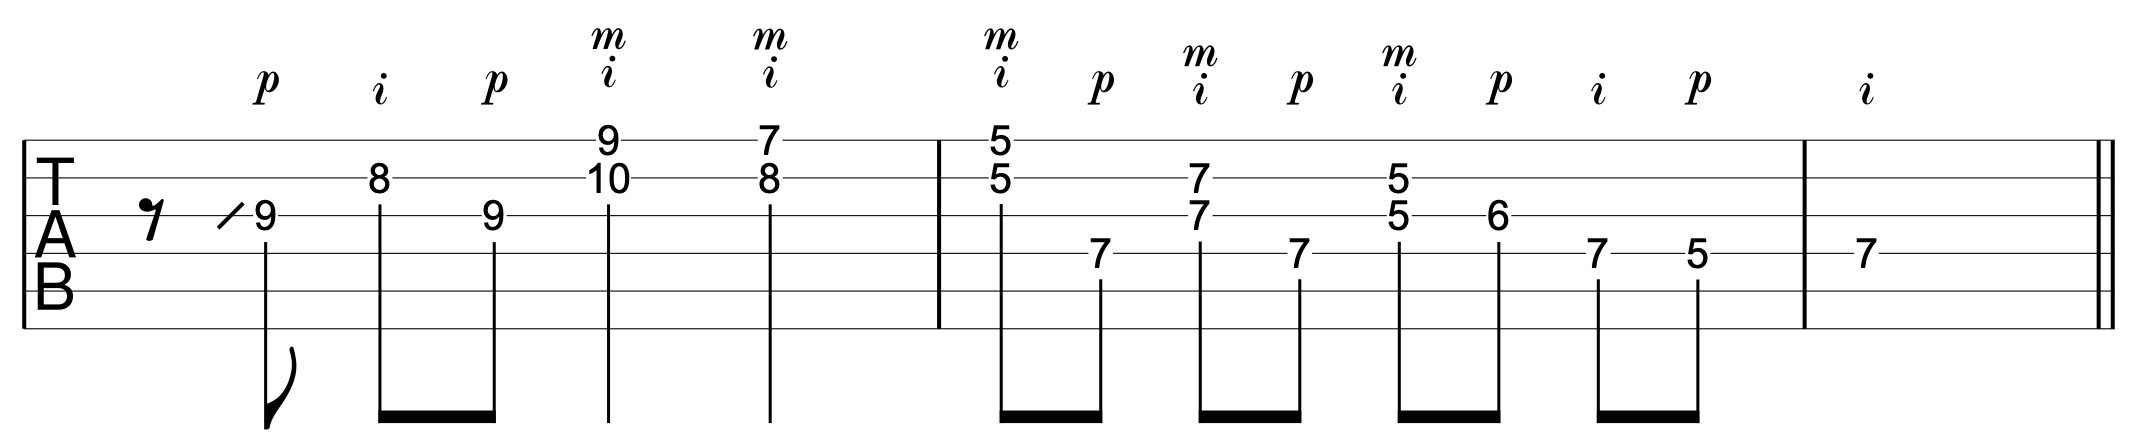
• Riffs
Here is this pattern applied to some riffs extending from the pattern:
(i)

(ii)
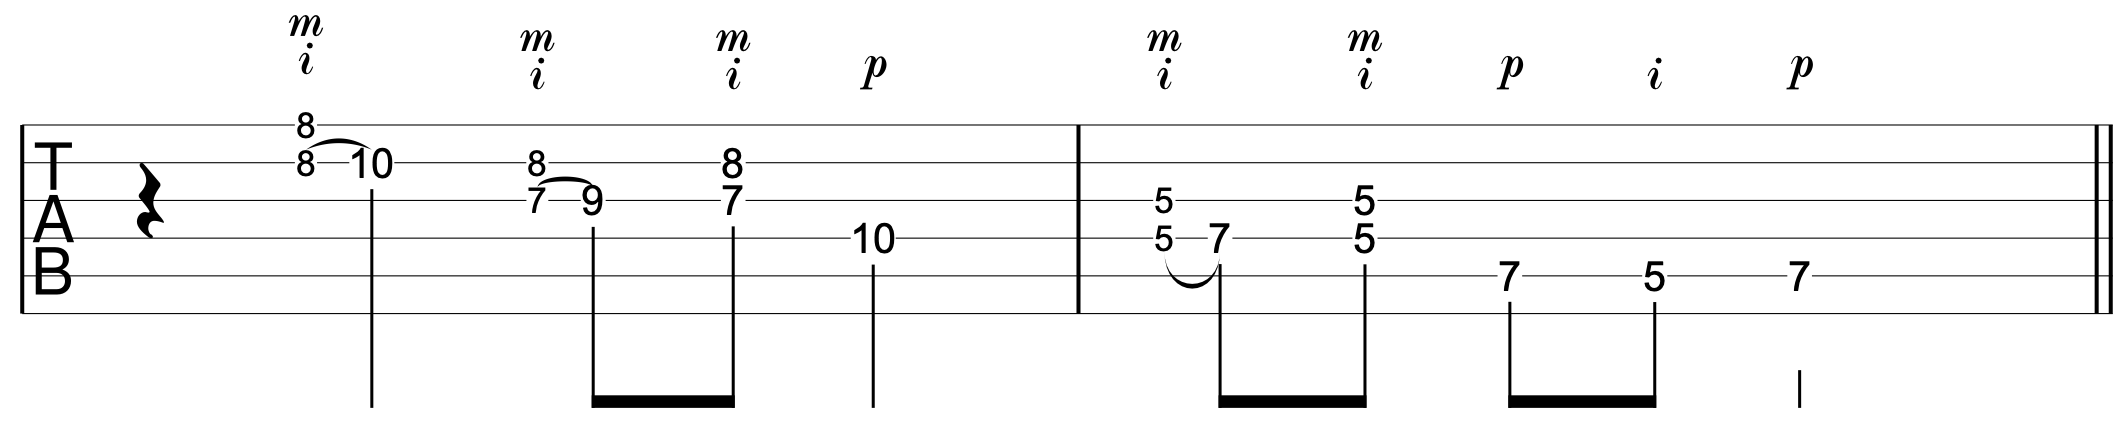
(iii)
So now you’ve got the three pillars for fingerpicking single notes on guitar:
• i/m alternation for speed and efficiency
• p/i for groove
• p/i/m rolls for flow
Put them together, and you’re not just fingerpicking chords anymore — you’re fingerpicking solos that sound professional, musical, and expressive.
Want to learn how to fingerpick?
Check out my online beginner fingerstyle guitar lesson program