How To Create Beautiful Music On Guitar With A Two Chord Vamp
by Simon Candy
Below, I take you through 5 simple steps to develop the ability to create hours of beautiful music on your guitar with one simple chord change. With a little bit of the old creativity juice, there is much you can do with just a little when it comes to chords on guitar.
The video below will help reinforce and further train what is covered in this lesson, so bookmark it to check out after working through what follows:
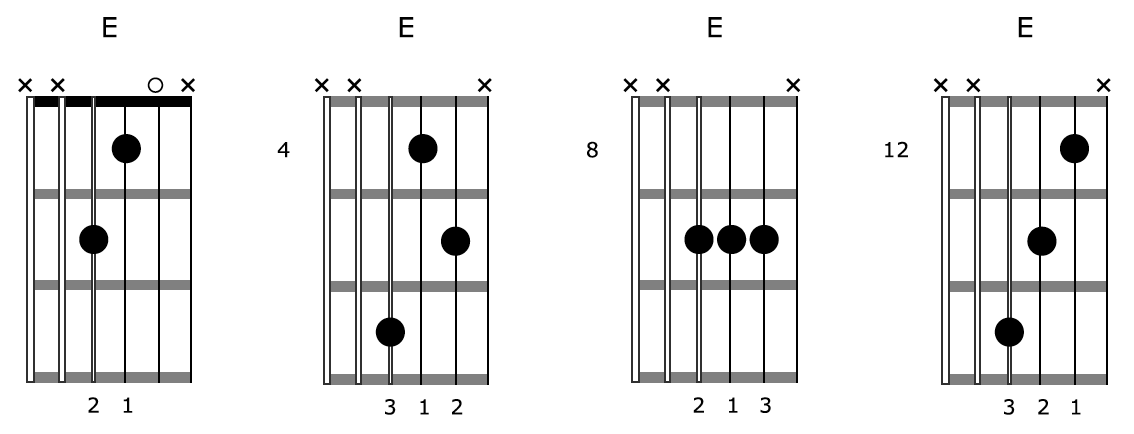
• Step 1: E Chord Shapes
Here are the four E triad chord shapes I want you to learn:

* the 4th shape is really the same as the first shape only an octave higher
Below are the diagrams for each chord:
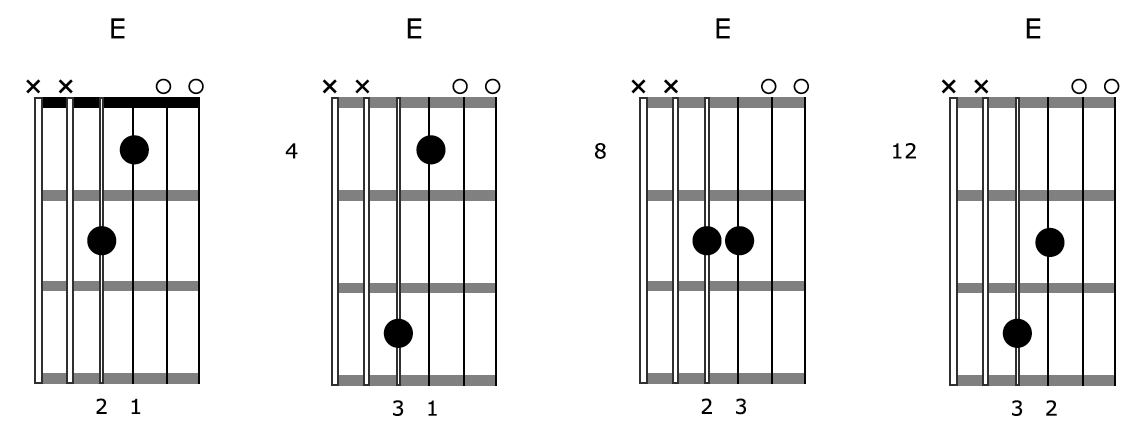
• Step 2: Open Strings (High Drone)
Next, you simply add the open second string by removing the finger that is on this string resulting in the following chord shapes:

We will also include the open first string with our E chord shapes.
This creates a cool, droning sound on the top of each chord, which is an essential component of the beautiful music you will soon be creating with these chords on your guitar.
Below are the diagrams for each chord:
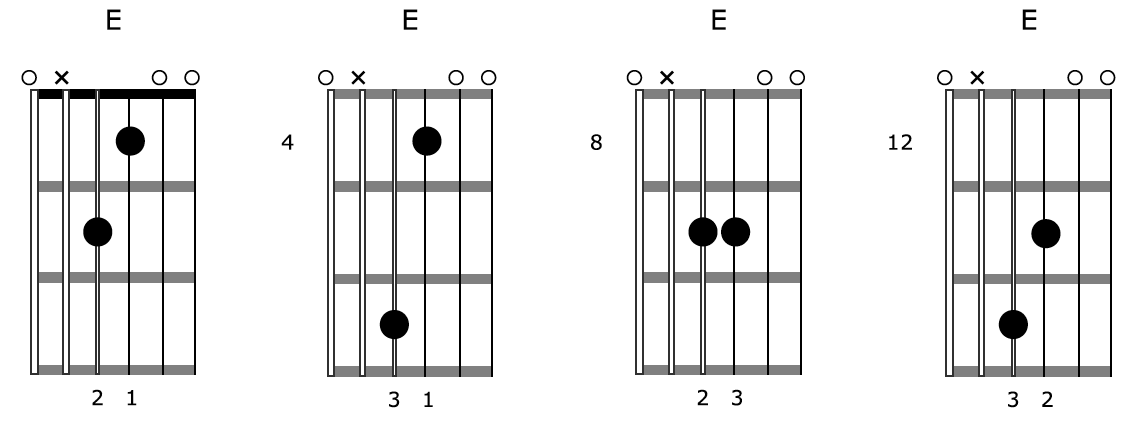
• Step 3: Open Strings (Low Drone)
To achieve a full sound with our chords, we will also include the drone of the low E string like so:

This provides the lower end that now makes what you play sound full and complete.
So simple, yet so effective!
You have the bass, the chords, and in just a moment, the melody component.
These are the 3 layers of music.
Below are the diagrams for each chord:
To become more familiar with these shapes, let’s apply some strumming to our E shape:

And picking through the notes of the chord shapes separately, like so:

• Step 4: Adding Notes
Now it’s time to add notes to our existing E chord shapes to create an amazing amount of variety to the sounds we can get from each.
Let's start with notes that sound more consonant becasue they are in key:


Here are all possible notes, in and out of key, that could be added to each chord on the top string of your guitar:


Some of the sounds you heard here may have seemed unpleasant due to their dissonant nature. However, dissonance is an important aspect of music and is necessary to create tension and release.
It’s all about context.
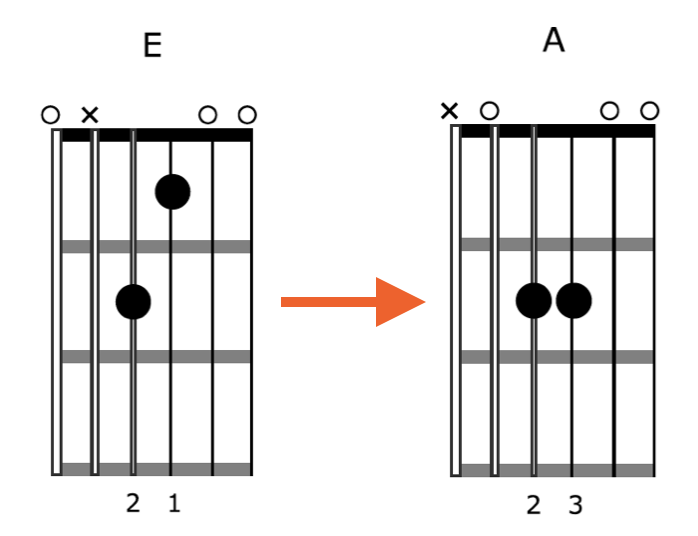
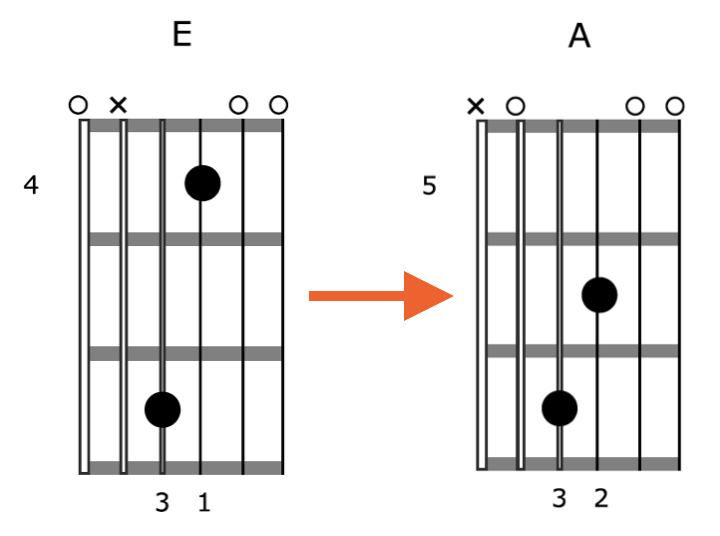
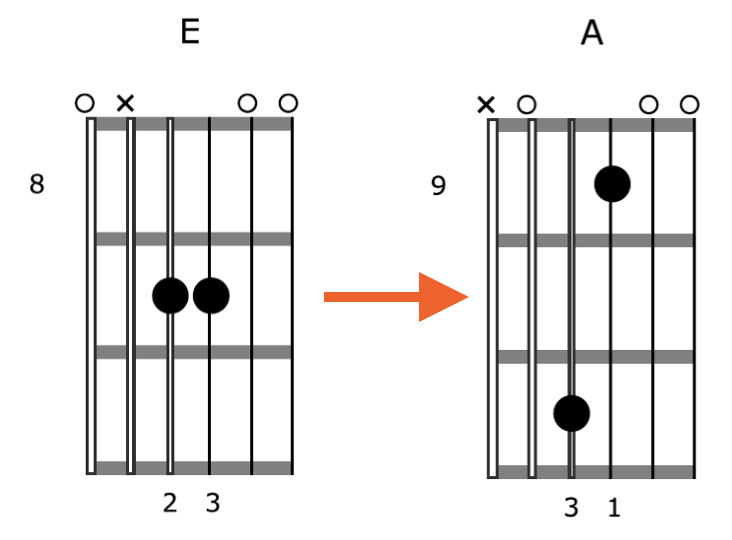
• Step 5: Adding The A Chord
So far, we have been practising with only one chord. But now, we are going to introduce an A chord to complement the E chord. This will allow us to create more diverse sounds.
To do this, you simply need to position the two chord shapes next to each other on the fretboard.
Here are the paired shapes of both the E and A chords, based on their proximity on the fretboard:
Pairing 1:
Pairing 2:
Pairing 3:
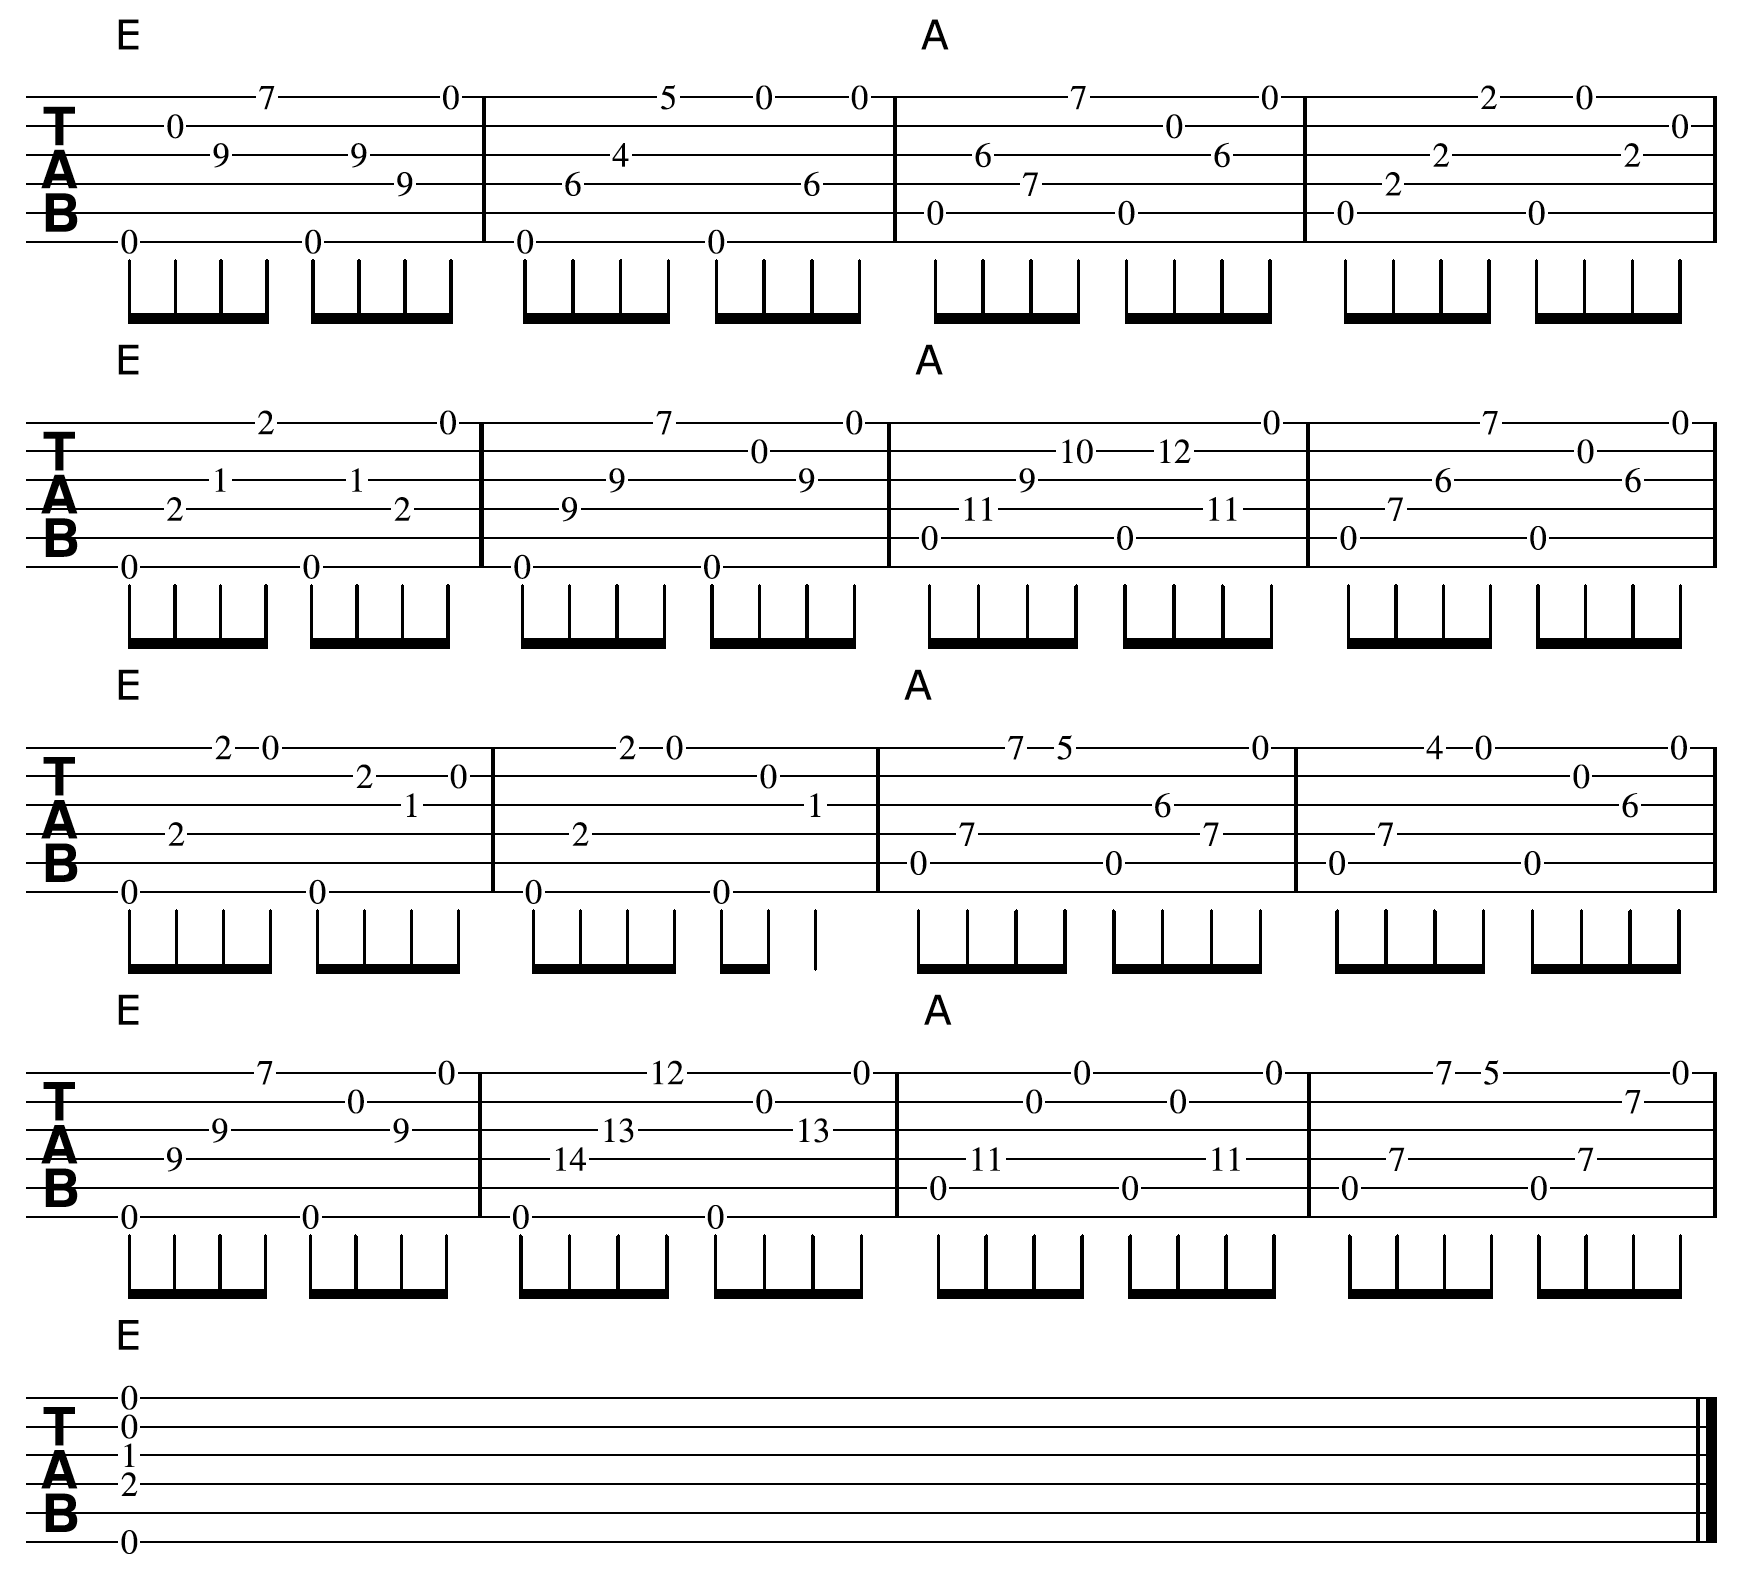
Creating Beautiful Music Using A Two Chord Vamp
The following are examples of some simple two chord vamps using our E and A chord shapes.
• Chord Vamp 1
This first example uses the first chord shapes for each of the E and A chords:

• Chord Vamp 2
Here I am creating a two chord vamp with the second shapes for the E and A chords:

• Chord Vamp 3
Finally, here is another two chord vamp using the 3rd shape for each of the E and A chords:

Mixing Chords Shapes
Once you become comfortable playing two-chord vamps using the E and A chord shapes in their corresponding positions, you can start mixing them up to create an almost endless amount of awesome, awe-inspiring music on your guitar.
Here is an example of that:
Discover how to create great sounding solos on guitar using chords