How To Play Harp Harmonics On Guitar
By Simon Candy
Playing harp harmonics on an acoustic guitar creates a magical and mesmerizing sound. Also known as cascading harmonics, this technique will dramatically increase the dynamics and range of the instrument. The technique of playing harp harmonics on a guitar is so called because the resulting sound is reminiscent of that of a harp.
In this lesson, I will guide you through the process of creating these beautiful harmonics in your guitar playing. With a little practice, you will be able to master this breathtaking technique.
The video below will reinforce and further train harp harmonics, so bookmark it to check out after working through this lesson:
If you are new to this technique, it's worth getting comfortable with a clean, natural hamronic technique first
The Harp Harmonic Technique
The technique for harp harmonics will be quite unlike anything you have done with your guitar playing before. While a picture may be worth a thousand words, a video is worth even more, so be sure to watch the video above to see this technique demonstrated for you in great detail, and reinforce what we are about to cover now.
There are 3 ways you can approach playing harp harmonics. I use all 3 depending on the context in which I am using harp harmonics. The following is a brief rundown of each approach.
• Bare Thumb
Using your fingers is perhaps the most natural way to play harp harmonics. Your bare thumb will be used to pluck the string. It is a slightly different sound compared to using a plectrum or thumb pick, with the harmonics not quite having the same sustain or resonance but still sounding great all the same.
• Flat Pick (Plectrum)
Using a plectrum is another option for playing harp harmonics. However, to play the harmonics, you need to free up your index finger, which means holding the plectrum between your thumb and middle finger.
This leaves you with only your ring and pinky fingers to play regular notes.
Using the bare thumb approach allows you to use your middle finger to play regular notes in addition to your ring and pinky fingers.
• Thumb Pick
A thumb pick gives you the best of both worlds. You get the sustain of the harmonic from the pick, as well as the use of your middle, ring, and pinky fingers for the regular notes.
The Harmonic
To get the harmonic sound you will be using the index finger of your picking hand. We will start with the natural open string harmonics situated at the 12th fret, so you can give all your focus to the picking hand without having to fret anything for now.
Simply take the index finger, of your picking hand, and place the tip of it directly over the 12th fret of the bottom string of your guitar. Don’t place it in between the frets as you do when playing regular notes, it needs to be directly over the top of the fret itself.
You only need to touch the string. It is the lightest of light touches, any more and the harmonic will sound suffocated.
Once in this position, use the thumb of your picking hand to pluck the string the index finger is touching, from behind. The resulting sound should be a bell like harmonic.
When performing this part of the harp harmonic technique focus on the following:
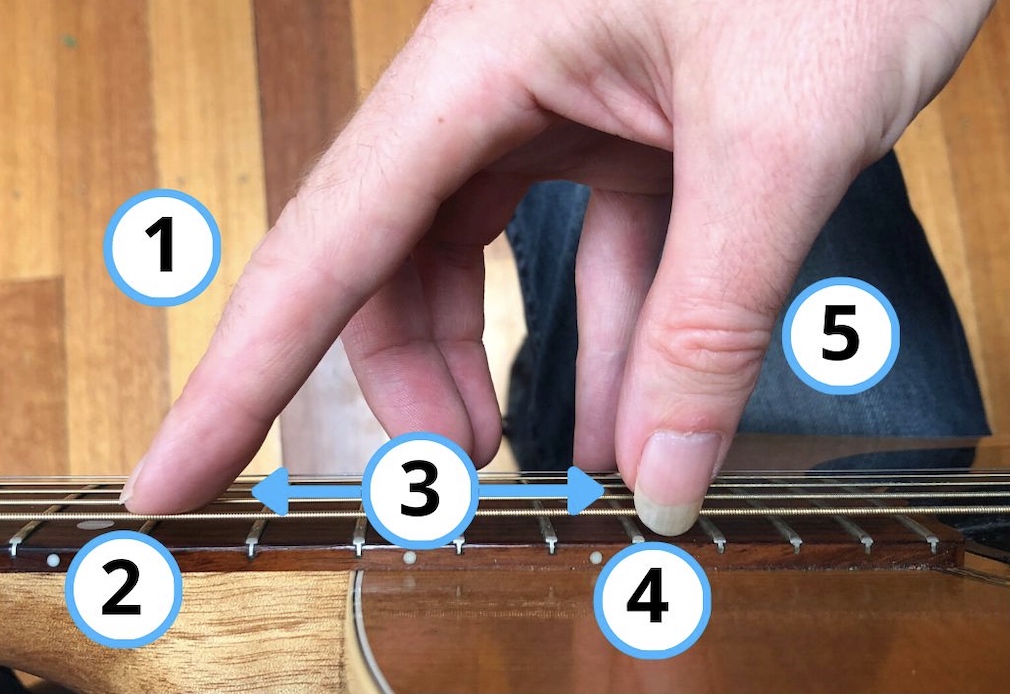 1. Keep the index finger straight.
2. The tip of the index finger lightly touches directly above the fret.
3. Keep a good distance between the index finger and thumb.
4. Pluck the string with your thumb to sound the harmonic.
5. Keep your thumb straight.
Practice your harmonics by running them up and down the six strings of your guitar at the 12th fret. Be patient, it will take a little getting use to this technique:

* Notes that are to be played as harmonics are indicated with a colon (:) symbol next to them. For now, all notes are played as harmonics, however, shortly we will be adding regular notes.
Fretted Note Harmonics
Now that we have learned the basics of sounding harmonics, we can take it to the next level and apply them to fretted notes instead of just open strings. This will greatly enhance your ability to use this technique.
When you apply harmonics to fretted notes, it is important to maintain a 12-fret distance between the note you are fretting and the harmonic that your index finger is sounding. This is why we were able to sound the harmonics of the open strings at the 12th fret, and not the 13th or 11th frets, as we were exactly 12 frets above the open strings.
Let’s look at an example.
Start by barring all six strings at the 3rd fret of your guitar. This is a Gm11 chord:
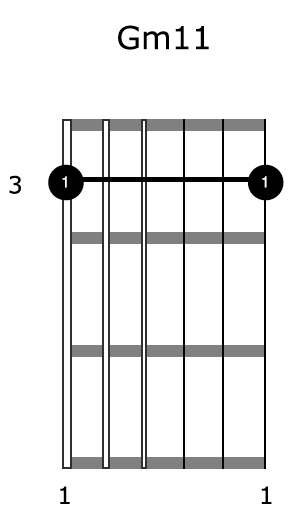
To sound the harmonics of this chord, simply place your index finger directly over the 15th fret, which is exactly 12 frets above where you are fretting your notes.
Here are the harmonics ascending and descending the strings of the Gm11 chord:

Remember to keep a very light touch, and to pluck the string from behind with your thumb as described earlier.
We can extend this approach by outlining other chord shapes with our harmonic technique. Take this C9 chord for example:
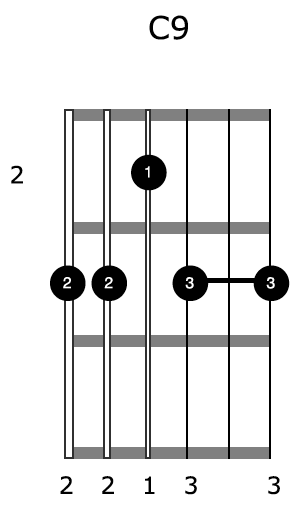
To extend the harmonics, I am including the 6th string in this chord. However, it’s more common to fret this shape from the 5th string
To apply our harmonics to this chord we simply visualise and track the shape of the chord 12 frets above from where we are fretting it:

Notice we have to adjust where we play our harmonic on the 4th string to stay true to the shape of the C9 chord we are fretting. This harmonic is sounded by placing our index finger directly over the 14th fret, with the others located at the 15th fret.
Here is another example, this time tracking the shape of an FMaj13 chord which contains both fretted and open notes.
Here is the chord shape:
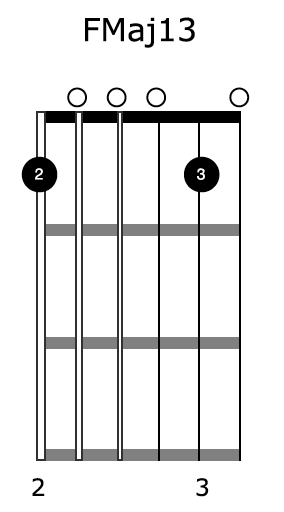
And here are our harmonics being applied to it:

Harp Harmonic Patterns
Now for the magic!
While our harmonics already sound great, adding regular notes into the mix can create a cascading harp-like sound on our acoustic guitar.
To achieve this, we will alternate between playing harmonic notes and regular notes. You will play the harmonic notes using the thumb and index finger technique while using the ring finger of your picking hand to pluck the regular notes.
Here is one of several common harp arpeggio patterns that alternates harmonics at the 12th fret with regular open string notes:

If you have the position of your thumb and index finger correct, you will find that your ring finger will be in the perfect position to pluck the open strings.
However, it is important to take your time and be patient as this may feel unfamiliar to your picking hand at first, especially since it has never done this before. So, don't worry if it feels awkward for a little while.
Once you have the hang of this harp harmonic arpeggio pattern, you can really go to town with it by applying it to any chord shape you are fretting. Just remember to:
1. Always maintain 12 frets between your fretted note and harmonic note
2. Track or trace the exact shape of the chord you are fretting regarding the harmonic notes you are playing. You need to visualise the shape of the chord 12 frets above your fretting hand
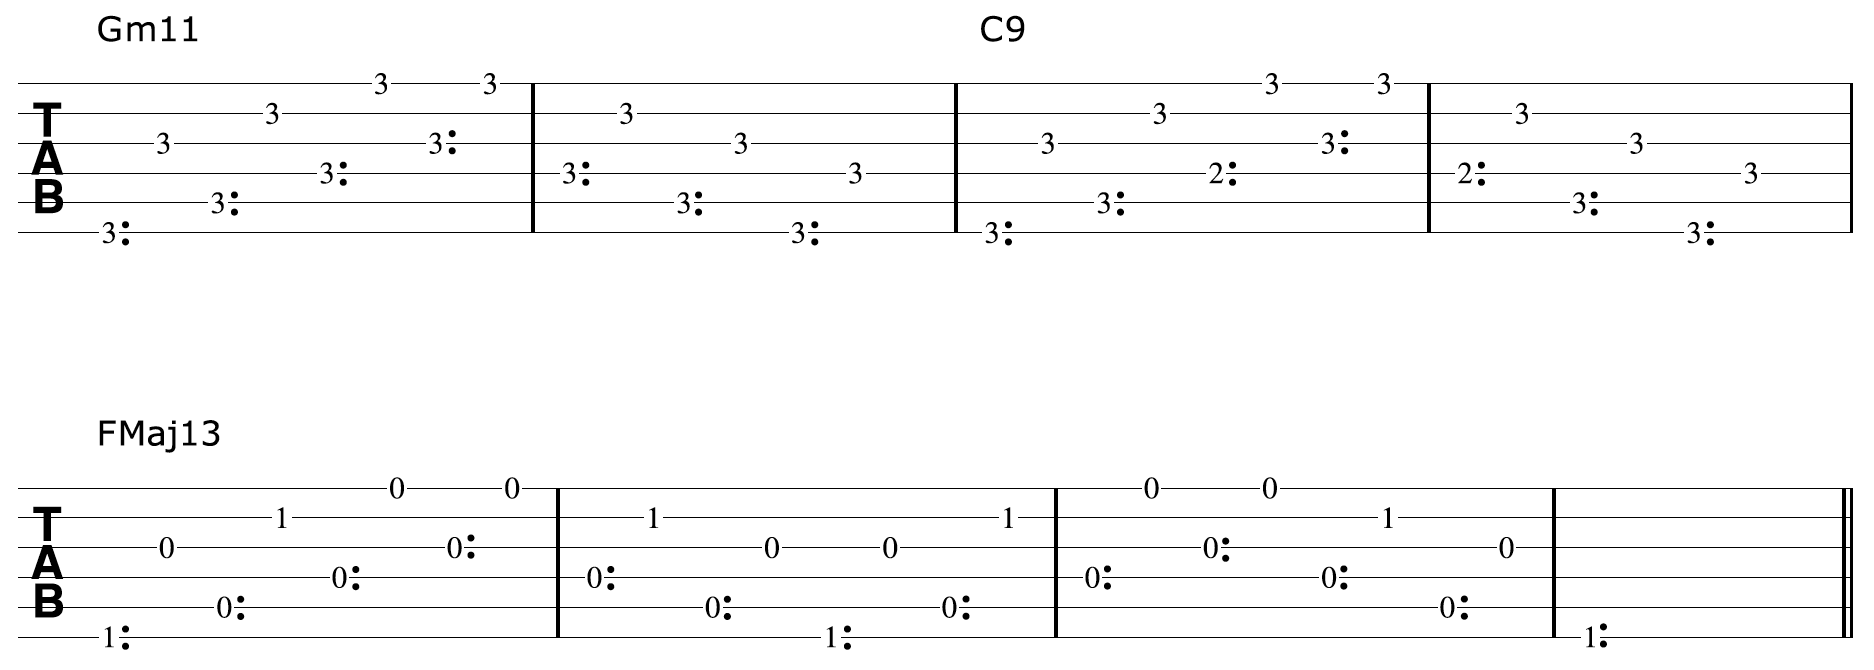
Here is our harmonic arpeggio pattern applied to the Gm11 chord:

Here it is applied to the C9 chord:

And finally to the FMaj13 chord:

In each of the examples given above, the picking hand follows the same pattern for both the harmonic and regular notes. The only difference is the location of the harmonics, which are always 12 frets above the fretted note.
This produces a different shape for the picking hand to follow, depending on the chord that is being fretted.
Connecting all 3 chords we have looked at creates an awesome sounding harp harmonic progression:
To further work with harp harmonic patterns check out the video below. In it, you learn more common harp harmonic patterns:
Learn 5 beautiful, breathtaking harp harmonic chord progressions