How To Make An Acoustic Version Of A Song Sound Better Than The Original
by Simon Candy
 When trying to play or do something on guitar we have a choice, we can go it alone with the trial and error approach which is time consuming, frustrating, and often unrewarding, or we can look to others for help and guidance.
For example, observing and analysing how artists take an electric guitar song and create an unplugged version of it on the acoustic is a great way to expand your creativity on the instrument.
Arranging unplugged versions of songs has been common practice for many years now. There are numerous examples of this out there waiting for you to pick apart and learn from so that you can create your own.
Today, we are going to do exactly that by taking a look at various parts of existing acoustic songs that have been created by certain artists as versions of the originals, that were often played on electric guitar. These original versions generally have the whole band playing, however the acoustic versions may have a more stripped back line up and feel, or in some cases no band at all, just the acoustic guitar and a vocal.
By carefully listening, observing, and analysing how musicians have created acoustic versions of these songs, we can learn how to do the same and in process improve our overall guitar playing skills.
Analysis Of Unplugged Acoustic Songs
The following is a collection of songs that have been arranged for the acoustic guitar. Be sure to listen to both versions, the original and the unplugged arrangement via the links below so you can fully comprehend and understand my analysis of each song.
1. Everlong
Artist: Dave Grohl (Foo Fighters)
Dave Grohl's acoustic take on the band's song Everlong is a classic. Stripped right back to its bare bones, it is simply a vocal line and a single acoustic guitar. Gone is the intensity of the original version, replaced with a more mellow rendition.
What's Changed?
Slower tempo:
Changing the tempo for the acoustic version of a song is a great way to change the feel of the original. It can leave more room for the vocal and guitar parts to breathe as is the case with this rendition of Everlong. It is considerably slower than the original version.
Altered arrangement:
Sometimes certain parts of a song are re-arranged to suit the acoustic version better. This is the case in the bridge of Everlong. From 3.10 into the acoustic version, until the end, the arrangement of the song changes compared to the original.
In the original, the pre chorus, which has been played twice to this point in the song, is played once more building to the final chorus.
The difference is that the cycle at this point in the acoustic version is repeated 5 times as compared to 3 in the original.
The unplugged version also resolves to the I chord (D) whereas the original leaves the ending unresolved finishing on the IV chord (G).
Leaving parts out:
It’s inevitable that if you are only going to use a single acoustic guitar in your version that you will need to leave parts out. This is fine as your aim is not to copy the song onto your acoustic but to create your own take on it. In Everlong the intro riff that appears at certain points throughout the song has gone, however, at no point do you feel like anything is missing in the acoustic version as it is its own song.
2. Hey Ya
Artist: Obadiah Parker (original by Outkast)
This unique take of Hey Ya by Obadiah Parker shows you just how creative you can get when arranging a song for the acoustic guitar. It's often the songs that you least expect to hear an acoustic version of, that work out the best.
What's Changed?
Feel and tempo:
The feel of this acoustic version of Hey Ya compared to the original could not be more different. It's basically a whole new song. This is a great example of how effective changing this one element (ie. feel/tempo) can be in creating a great acoustic version.
Having said that this version still certainly sounds like the original “Hey Ya”.
You don’t want to be changing a song to the point where it is no longer recognisable.
Change of key:
The key of this acoustic version of Hey Ya has been changed from G to E. The guitar is also capo'd at the 4th fret, allowing you to effectively use the chords of C major. Having different open chord shapes to use compared to the original will provide subtle nuances that really contribute towards the sound of the acoustic version.
Further to this, the last chord of the progression has been changed from a major to a minor chord. This adds to the more mellow feel of the acoustic version.
To learn creative ways to use a capo on guitar, check out the video below.
In it, I show you 3 approaches to using a capo that will enhance your creativity on the instrument:
3. Message In A Bottle
Artist: John Mayer (original by The Police)
This is another great acoustic take of a famous song by The Police. Once again we have a single acoustic guitar and vocal line. The sign of a great song is when you strip it right back to its roots, and it still works. This is exactly what John Mayer has done here. As is the case with many acoustic versions, the tempo is slower and we have a much more laid back feel throughout.
What's Changed?
Fingerpicking:
In his version of Message In A Bottle, John Mayer uses a fingerstyle approach. This allows him to play the chords in a way that wouldn't be possible with a pick. Using your fingers also provides a different tone compared to that of a plectrum.
Percussive elements:
Mayer is also slapping the strings on beats 2 and 4 throughout the tune. This percussive element is extremely effective and is a great technique for a single acoustic guitar approach.
All this amounts to a very cool, mellow and laid back version of the more upbeat original by The Police.
To discover more ways to play your acoustic guitar percussively, check out the video below.
In it, you learn the basics of percussive guitar including how to create beats and grooves on the body of the guitar and integrate these into the chord progressions you play:
4. Imagine
Artist: Jack Johnson (original John Lennon)
This classic has been covered by various artists numerous times. Jack Johnson's acoustic version here certainly holds its own. This is an example of taking a song that is played on another instrument, in this case, a piano, and arranging it for the acoustic guitar.
What's Changed?
Arranging from other instruments:
Once again the capo comes into play in this acoustic version. It is on the 6th fret allowing the chords of C major to be used. Throughout, Johnson is using a fingerstyle approach, arpeggiating all chords.
Notice that he is not trying to copy the piano part in the original. This is never the goal, rather he is creating his own unique take on a classic.
Taking a song that is played on another instrument, and creating a version of it on the acoustic guitar, is a great way to immediately have something that sounds unique to the original. Take this into account when choosing a song to create an acoustic version from.
To learn how to take a piano part and play it on your guitar check out the video below.
In it, I walk you through some piano excerpts of music and then break down how you could approach playing these excerpts on your guitar so you can do the same:
5. Girls Just Want To Have Fun
Artist: Greg Laswell (original Cindy Lauper)
Ok, so this is not an acoustic version, but rather a piano version of a famous song from the 80s. Listening and analysing versions of songs that other instruments have arranged will provide you with a wealth of ideas that you can use in your own creations on the acoustic. Many of these ideas you may never come across otherwise. Compared to the original, this is basically a completely different song.
What's Changed?
Chord embellishing and substitution:
Apart from the fact that this version of Girls Just Want To Have Fun is played on a piano, at a much slower tempo, creating a very different feel, it's in the chord choices, and how they are being played compared to the original, that you will perhaps learn the most.
The key has changed from F# to B in this version. Playing at slower tempos allows you to include things like chord arpeggiation and embellishments which is certainly true here.
There are also chords that have been included that do not appear in the original. These have been substituted. See if you can hear the slash chord being used in the intro and verses.
A great thing for you to do here would be to transcribe the chords from the original song, then transcribe the chords from this version, put them in the same key and compare. You will learn so much doing this.
Check out the video below to learn how to embellish the chords you play on the guitar.
In it, you learn various ways to embellish open chords, from simple to more advanced, before putting these into progressions:
Ready to take your skills further? Learn how to create your own amazing acoustic instrumental versions of songs with this free ebook/audio download.
Transform Your Playing By Transcribing Music From Other Instruments Onto Your Acoustic Guitar
by Simon Candy
 A fantastic way to totally transform your guitar playing is to simply transcribe, or arrange a song that another instrument plays, onto your acoustic guitar. By transcribe, I mean to copy or arrange the musical lines and phrases of another instrument and play these on your acoustic guitar.
Arranging lines and phrases from other instruments is a great way to become more creative and inventive with your own guitar playing. Fact is, no two instruments are the same when it comes to creating music. They not only sound different, but they also execute and arrange the sound of their notes in unique ways.
Through the act of arranging and transcribing from an instrument other than a guitar, you will tap into the unique qualities of that instrument and play your own guitar in ways you never would have otherwise.
Arranging songs from other instruments is also fantastic training for your ear as it can be more challenging to work out the notes of another instrument, simply because they sound different than those of a guitar that your ear is more use to hearing.
Keep reading to discover how to work songs out by ear.
No magic is involved. It is simply practice coupled with strategic methods that work.
But What If I Don't Know How To Transcribe Songs?
 Hands down, without question, the best thing I ever did regarding my guitar playing was to start trying to work out songs using my ear. I did this very early on, within the first year of playing, and was so glad I did!
Sure it can be challenging, I certainly discovered this, but it is also extremely rewarding both in the achievement you feel in having worked something out totally by ear, and in the massive improvements you will see in your guitar playing as a result.
It is for sure one of the best ways to fast track your progress on the guitar.
When working out and arranging songs using your ear be sure to:
- Listen very carefully and stop the recording immediately after the part you are working out. What your your ear last heard sticks, therefore you will have more chance of getting it down this way.
- Just work out a little piece at a time. This will likely be a single note or chord if you are just starting out. Trying to do too much at once won't work. As you get better you will be able to work out larger chunks, but for now, start with little bite size pieces.
- Sing/pitch the note you are trying to work out with your voice. If you can't sing it, you won't have much chance finding it on your guitar.
- Listen to and work out the notes the bass guitar is playing, as it will often be targeting the root notes of the chords, and will help greatly in working these out.
- Take advantage of technology. There are many great programs and apps out there that will allow you to manipulate a song in various ways that will make it much easier to work it out using your ear. You can slow music down without effecting the pitch as well as loop sections of a song etc.
Check the video out below for detailed demonstrations of strategies for working songs out by ear:
In this video, I’ll take you by the hand and run you through the process of working out both chord progressions and single note riffs and melodies using your ear.
You also learn the importance of theory and fretboard knowledge, as well as “active listening” in being able to work songs out by ear:
On a side note, it is not necessary to be able to work out songs by ear to reap the benefits of this article. You could simply get a copy of the music the other instrument is playing and go from there.
About Phrasing . . .
As mentioned earlier, listening carefully to how different instruments are played, tapping into their nuances, and in turn arranging versions of these onto your guitar, will open you up to new, unique, and innovative ways of playing and phrasing your notes.
By phrasing, I am referring to HOW the notes are played and organised on a particular instrument. Different instruments will have unique phrasing, and as guitarists we want to tap into this and make it a part of our own playing.
We can relate the phrasing of musical notes to the way we speak. We all phrase our words and sentences differently as we are unique human beings. We put different emphasis on certain words depending on what we are wanting to say and how we are feeling. This is phrasing and is no different when playing music.
In this article I am referring to the general phrasing of an instrument. Each musician will have their own unique phrasing regardless of the instrument they are playing, and of course it's great to learn from those that really appeal to you.
Why Arrange Music From Other Instruments?
To work out a song, or part thereof, that another instrument is playing, onto your acoustic guitar is in principle no different to working out a song that a guitar is playing. It's the benefits that your playing will receive through doing so that is the point and why you want to be doing this.
• Horn Players
 Think of a horn player like a saxophonist or trumpeter. What is the one big difference when it comes to the phrasing of notes on these instruments compared to a guitar?
Answer: They need to stop to breathe regularly between the notes they play.
As guitarists we don't need to do this and is one reason why it's easy to get trapped into playing endless runs of notes with little to no phrasing. Transcribing and arranging music from horn players onto your acoustic guitar will certainly introduce the concept of space into your phrasing. What you don't play is just as important as what you do.
• Vocalist's
 How about a vocalist? (yes, your voice is an instrument)
Transcribing and arranging the lines that a vocalist sings onto your guitar will have you playing much more melodically as oppose to playing endless riffs. There is nothing wrong with riffs, but you will learn the finesse, subtleties and nuances that you can bring to a line of music, by arranging the melodies vocalists sing onto your guitar.
• Pianist's
 How about a pianist?
The mechanics of how they express music is different to guitar, simply because a keyboard is very different to a fretboard.
• A pianist has the use of all fingers to play notes, a guitarist does not
• The piano is very linear in its layout, the guitar is not (each string is effectively a separate keyboard)
• There is only one place to play any single note on a piano. On guitar there are several options for any given note
It's because of these differences that you will be forced into having to come up with unique ways to arrange what the piano is playing onto your guitar.
Watch the video below to learn how to take an excerpt of music played on a piano and arrange it for guitar.
In it, you will hear an excerpt of a piece of music played on a piano immediately followed by a demonstration of one way you could arrange this on your guitar.
We then break down the guitar arrangement so you can see exactly what I have done including my thought process on how to arrange the music from the piano to the guitar:
In summary, to fully develop your musical skills on the guitar, you need to also be looking outside of it. Broadening your horizons and studying the phrasings and nuances of other instruments, by creating arrangements from them, will go a long way to improving your own acoustic guitar playing.
Are you ready to take your fingerpicking skills from average to great so that your acoustic arrangements totally blow away those who hear them? Then check out these awesome advanced sounding fingerpicking patterns for your acoustic guitar!
How To Become A More Creative Acoustic Guitar Player - Part 2
By Simon Candy
 In part 1 of how to be more creative with your acoustic guitar playing, I ran you through two very cool techniques that you can use in your playing. In part 2 of this article, I am going to present three more ways in which you can drastically increase your creativity on the guitar.
Take your time to explore each approach below. There is much to be gained in regard to your guitar playing ability and creativity by doing so.
Open String Playing
Now, I’m sure you're familiar with what an open string is, but many acoustic guitar players don't fully utilize the creative potential that they offer. Open strings are commonly found in open chords, melodies, and riffs in the open position on the guitar. However, they can be used in any position on the guitar.
Let's take the following G Major scale as an example:

Now let's take every note in the scale above that exists as an open string, and play it as an open string while leaving the remaining notes fretted.
The result is this:

What a great sound and difference the open strings make when played against the fretted notes. Your guitar creativity will go through the roof when exploring this approach.
How To Start Creating With Open Strings On Your Acoustic Guitar Right Now
• Take an existing melody in G that you know and replace all the relevant notes with open strings. The sound of these against the fretted notes on your guitar will sound really cool.
• Try the same approach with the keys of C, A, E, and D. These work best because they contain a number of open string notes in them.
• Once you have worked out your open string scale (ie. C, A, E or D) start creating melodies with them on your guitar. Use existing melodies you know and transpose them to your key if need be.
Watch the video below for a very cool and unique way to use open strings with pentatonic scales.
This approach will have you playing open string riffs and runs all over the fretboard:
Using A Capo
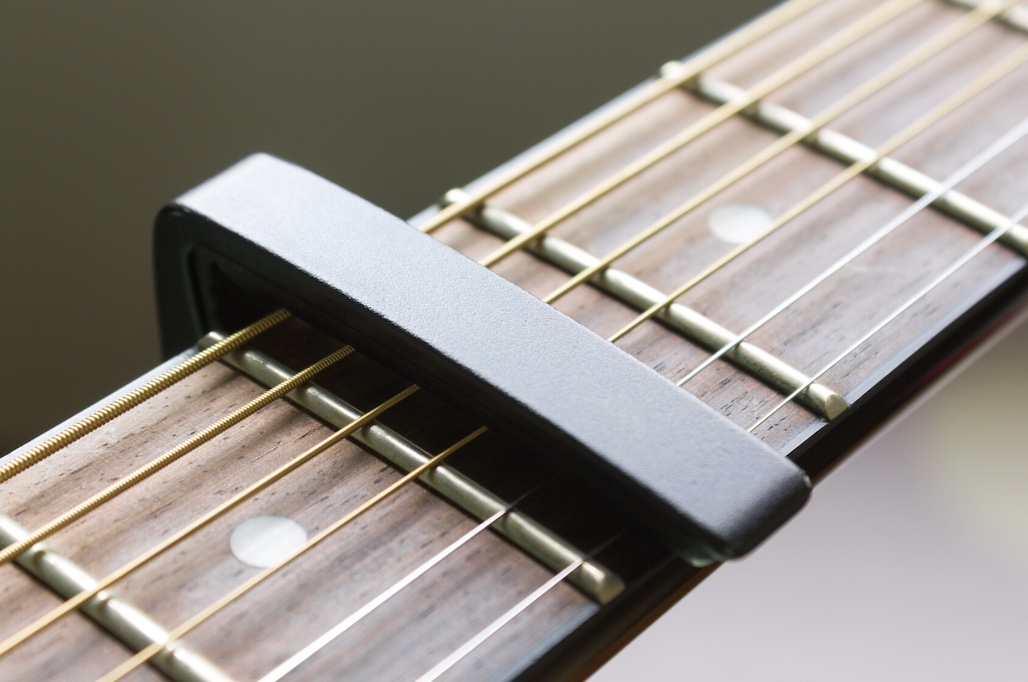 Using a capo can greatly enhance your creativity when playing acoustic guitar. It is a useful tool that allows you to switch keys instantly while still using open chords and open strings. Imagine a capo as a movable nut or your index finger when playing barred chords - it serves the same purpose.
Just place it on a fret of your guitar and clamp it down. For example, to play a Bb chord on your guitar without a capo you would need to bar it. However, if you capo your guitar at the first fret you will be able to use an A open chord to get the same sound.
Why?
Because placing your capo at the first fret of your guitar raises everything by one semitone. So an A chord, when played with your capo at this fret, sounds a semitone higher as a Bb chord.
How To Start Creating With A Capo On Your Acoustic Guitar Right Now
• Take a chord progression or song on your acoustic guitar that is in a key that has few open chords in it and capo at a position that allows you to use more open chords.
For F Major try placing your capo at either of the following fret positions: 1st, 3rd, 5th, and 8th
For Bb Major try placing your capo at either of the following fret positions: 1st, 3rd, 6th, and 8th
• Take the riffs and melodies that you come up with using the open string approach from earlier and use your capo to make them possible to do in any key.
• Try taking a chord progression that already includes open chords and using a capo to play it in a different position. This will give you a new set of open chords to work with even though you are playing the same progression in the same key. The result will sound different due to the capo and the use of different open shapes.
Checkout the video below for more ways to use a capo to enhance your creativity on the guitar:
Percussive Guitar Playing
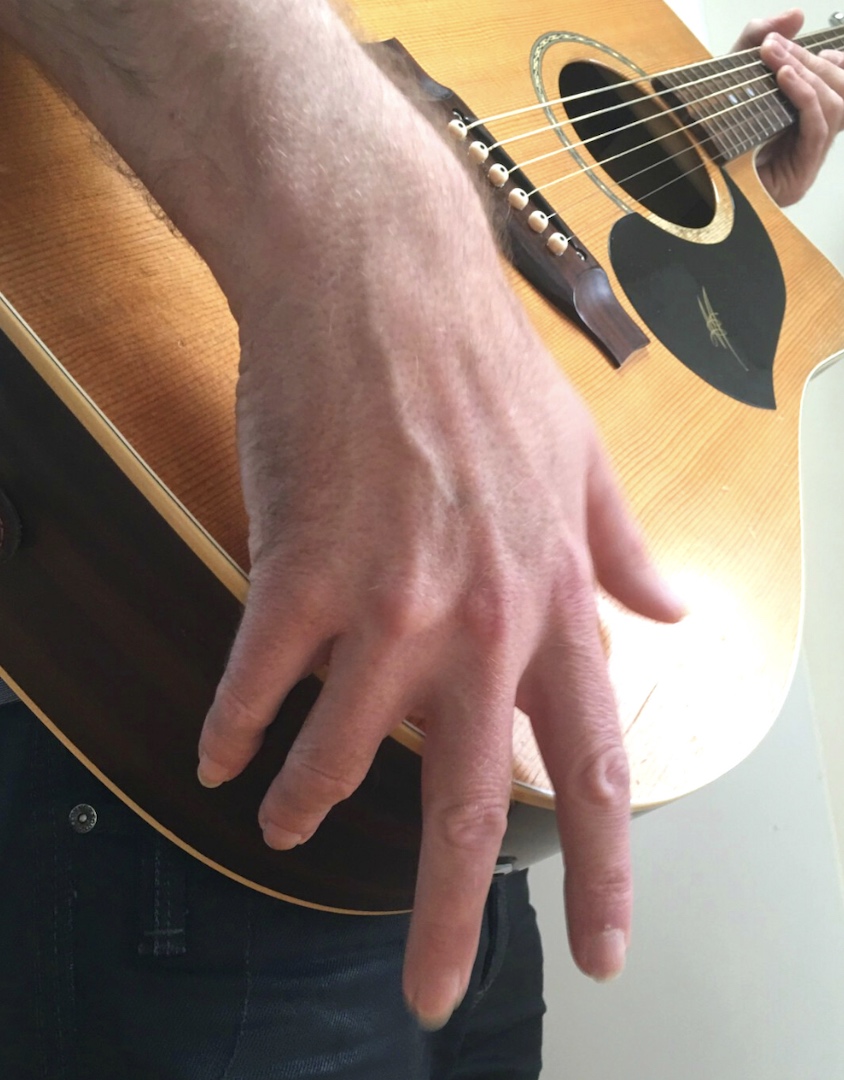 Have you ever considered playing your acoustic guitar as a percussive instrument? Though the guitar is known for its melodic capabilities, using it percussively has become increasingly popular. After all, it is made of wood, so why not explore this unique technique?
Playing your guitar in this way can change your perspective on how you approach and play it. The possibilities for creativity are endless. Don’t worry if you're not a creative genius, virtuoso, or prodigy. With some fundamental skills, you can produce great sounds and decide how far you want to take your percussive guitar playing.
Here is something to get you started:

* The Percussive hits are indicated below the tab in the drum notation. This is often used when notating stuff for percussive guitar.
In the progression above I am sounding the thumb hit (B.T.) with the side of my thumb on the lower area of the soundboard of the guitar just below the bridge. Think of this as a kick drum sound. Be sure to flick your wrist as you hit the body of the guitar with your thumb.
The snare sound (S) is achieved by tapping or rapping the side of your guitar just below the strap lock. I like to use my 3rd and 4th fingers for this but you can try any combination to see what works best for you. Be patient with this, we are trying to create a higher pitched sound and it can take some time to be able to get this consistently.
How To Start Creating With Percussive Guitar Techniques On Your Acoustic Guitar Right Now
• Really spend time honing both the kick drum and snare sound from the example above. These alone, without any chords, sound really cool and you can create a lot on your guitar with them.
• Listen to the drum beats of your favourite songs and emulate them on the body of your acoustic guitar using the snare and kick drum sounds.
• Take existing chord progressions that you know on your acoustic guitar and integrate a simple beat using your kick drum and snare sounds.
Checkout the video below for more details and breakdowns of basic percussive guitar techniques.
In this lesson, I take you through all the essentials of percussive guitar playing to get you up on going as well as how to integrate it with what you can already do on the guitar:
The Key Is To Start Creating On Your Guitar Now
It's important not to feel overwhelmed by the options presented in this article. Rather, take note of them and focus on exploring one at a time. If you end up trying something new with your acoustic guitar playing as a result of reading this article, you're on the right path.
Discover 5 unique and creative ways to play the same chord progression on guitar
How To Create Your Own Unique Acoustic Guitar Version Of Any Song
By Simon Candy
 In the last two decades, there has been a growing trend of producing acoustic renditions of electric songs. The quality of these versions can vary greatly, ranging from mediocre to exceptional.
The key lies in the approach taken to create them.
Simply playing an electric song on your acoustic guitar won't suffice in most cases. Despite the many similarities between the two instruments, there are also notable differences.
Furthermore, when creating a solo acoustic version of a song played by a whole band, there are additional considerations to make up for the missing accompaniment.
There are so many cool and unique ways that you can make your acoustic guitar version sound incredible in either a band or solo situation. In this article, I am going to present some of these to you so that you can get started creating awesome acoustic versions of any song you like!
How To Make Your Song Sound More "Acoustic"
So what exactly are some ways that you can compensate for the electric song in your acoustic version?
Here are a few.
- Adding bass lines
A great idea is to learn the existing bass line to the song you are creating the acoustic version from and include elements of it in your arrangement.
This idea is especially good if you are creating a solo version where it’s just you, your guitar, and a vocal. This approach fills out the sound more and creates movement within your chord progressions.
- Replace power chords with open and bar chords
Due to the fact that you don’t have distortion and the sustain of an electric guitar, it can be a good idea to replace all or some of the power chords in the song with full chords. It gives your version of the acoustic guitar a bigger, fuller sound.
You may choose open over bar chords, or the other way around, depending on what you want to do with them (eg. chord picking, embellishments, suspended/extended chords etc).
- Strumming
Sometimes you need to strum out more in your acoustic version.
This again is a way to compensate for the lack of distortion and sustain. Another reason for strumming out more in your acoustic song, assuming you are doing a version without a band backing you, is to compensate for other instruments.
Strumming can have a very percussive effect on the acoustic guitar and can provide a really cool groove if done well.
Check out the video below where you learn 3 ways to get a better strumming sound.
Patterns are only part of the picture when it comes to strumming.
You need to focus on the feel and dynamics for your strumming to sound musical. In this video, I show you 3 ways to make your strumming sound great:
- Adding melody components to chord progressions
A very effective thing to do, especially if you are creating a solo acoustic version, is to include hints of the song's melody in your chord progressions.
By doing this you will end up with some really nice embellishments and extensions to your chords. This approach will fill out the progressions of your acoustic song more, and can even provide a nice instrumental break within the song.
Check out the video below to learn how to include melody components in your acoustic guitar arrangements of a song.
I show you how to sketch out the melody of a song, without all the detail, to then include it with the chords you play.
The result is an arrangement that has something more to it than simply playing chords alone and relates to the song specifically because the ideas you use are born from the melody and themes of the song itself:
Soloing Techniques
An electric guitar solo transferred directly to your acoustic can be challenging to play. This is due to things including the position it is being played, and the techniques being used like string bending.
An electric solo, played note for note on your acoustic, can also sound weak and lacking due to having no distortion, sustain, or other effects that may be being used.
Here are some very effective and cool ways to overcome these issues when creating your acoustic version.
- Droning open strings
Droning the lower open strings of your acoustic guitar is a great way to provide some accompaniment for the riffs and solo’s that you play.
Think of the open droning strings as the left hand of a pianist, and the riffs you are playing as the right hand. This approach is best suited when creating a solo acoustic version, when YOU are the band. It will provide you with a bass component to your solo lines, albeit a simple one, and fill out the sound. It’s as simple as it is effective!
- Chord hits
“Chord hits” are when you play the chord that is happening at the time, in between the riffs and phrases of your solo.
This is similar to the droning string effect, but because you aren’t relying on open strings it can be done effectively in all keys. The chord hits provide a tonal centre for your solo to relate to. You are basically sketching out the harmony (chord progression) to the solo you are playing, at the same time.
The chord hit approach will also throw up some really cool syncopated rhythms between the chords and phrases that you play. This kind of naturally happens as you work out where is best to hit the chord and where is best to fit the phrase around that chord. There will be more than one possibility.
The more chords you know on your guitar the better you'll be with this approach, as you will always have a chord close by to inject into your solo. You can also approach your chords from a fret above or below for added interest.
- Double stops, bends, and slides
When playing acoustic guitar, certain techniques like bending can be challenging due to string gauge or playing position.
In such cases, sliding to the desired note can serve as a great alternative to bending. Incorporating subtle nuances like this can help achieve a more authentic "acoustic" sound in your solos.
You don’t necessarily always need to replace a bend with a slide though. Sometimes you just need to change the position at which you execute the bend on your acoustic. You will find some strings are much easier to bend than others. For example, bend the 7th fret on the third string of your guitar. Now bend the 3rd fret on the second string.
See what I mean?
Using double stops can add an acoustic element to your solos.
To create a double stop, play two notes simultaneously on your guitar. This technique provides a pleasing contrast to the single notes in your solo and can add intensity to your playing. Additionally, double stops can compensate for the lack of distortion in your solo, making your licks sound more robust and full.
Check out the video below to learn some common double stop riffs that sound great on an acoustic guitar:
For more specific and detailed examples of approaches covered in this article, check out this ebook and audio on creating your own acoustic versions of songs on guitar.